You may have heard the terms “out of gamut” or “CMYK” being used and are wondering what those are? Well, I am not going to go in depth about it, but in layman’s terms, CMYK just represents the colors Cyan, Magenta, Yellow and a Key color (most often Black). “Out of gamut” simply means the colors are going to print incorrectly with a printer which is using a CYMK set of inks. Most inkjet printers use RGB (Red, Green, Blue) so this is no big deal for at home printing. But, some printers like lasers or professional photo or book printers use CMYK. Basically, the reason we talk about out of gamut or CMYK, is because if you don’t want some funky coloring going on with your images it’s nice to fix those issues before heading to the printer.
I have some instructions, and a little explanation on how to do this in Adobe Photoshop. But if you don’t have that program, you can use a readily accessible application called Photopea. It is free, with no install since it runs in your browser and so you can do this yourself. I know some use this method to Quality Check their designs. You can jump to my Adobe Photoshop or Photopea Instructions by using the buttons below.
Adobe Photoshop
If you have Adobe Photoshop this is pretty simple and straightforward.
1) Just open your RGB image.
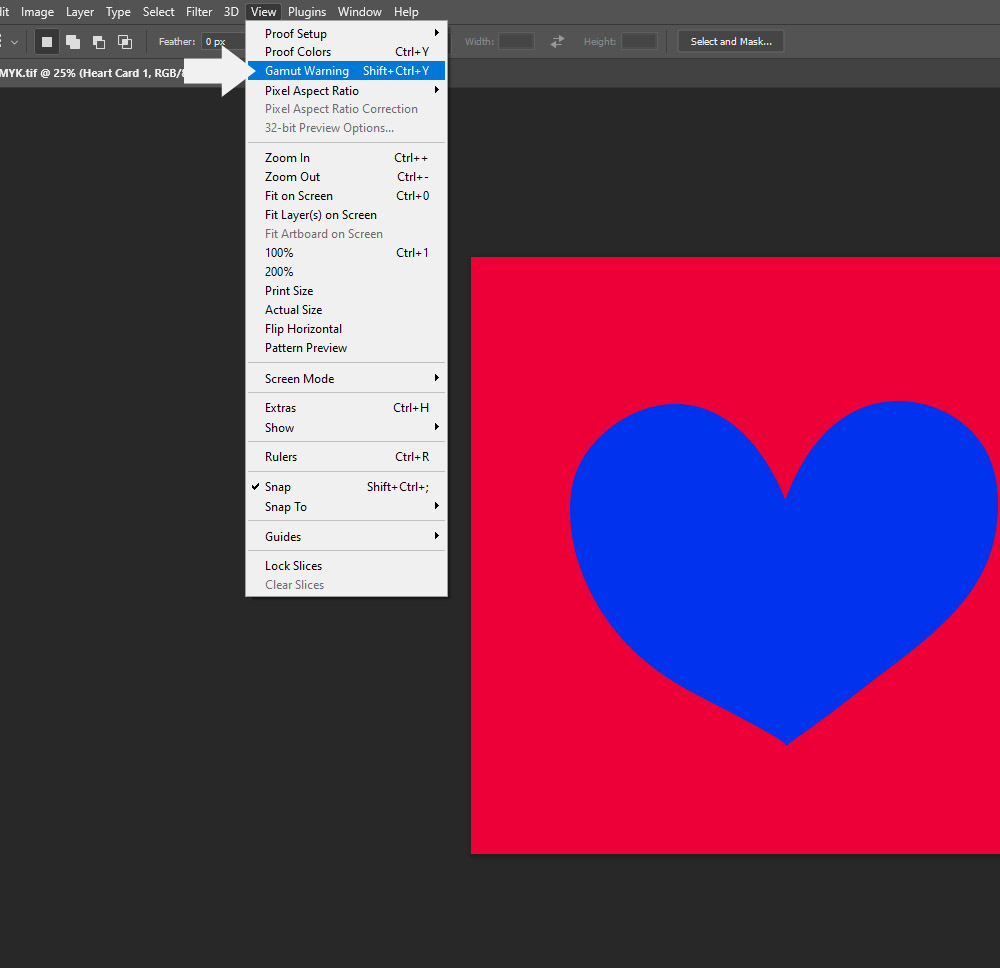
2) To see if there are any “out of gamut” colors just select View->Gamut Warning. Any colors that would end up different on a CMYK printer, will appear as a gray color.
You can test this with the colors #ec0038 and #0032ec. The reddish pink background color in my example will print just fine on a CMYK printer. But as you can see the blue heart has a warning that it is out of Gamut (and thus will not print the color you expect).


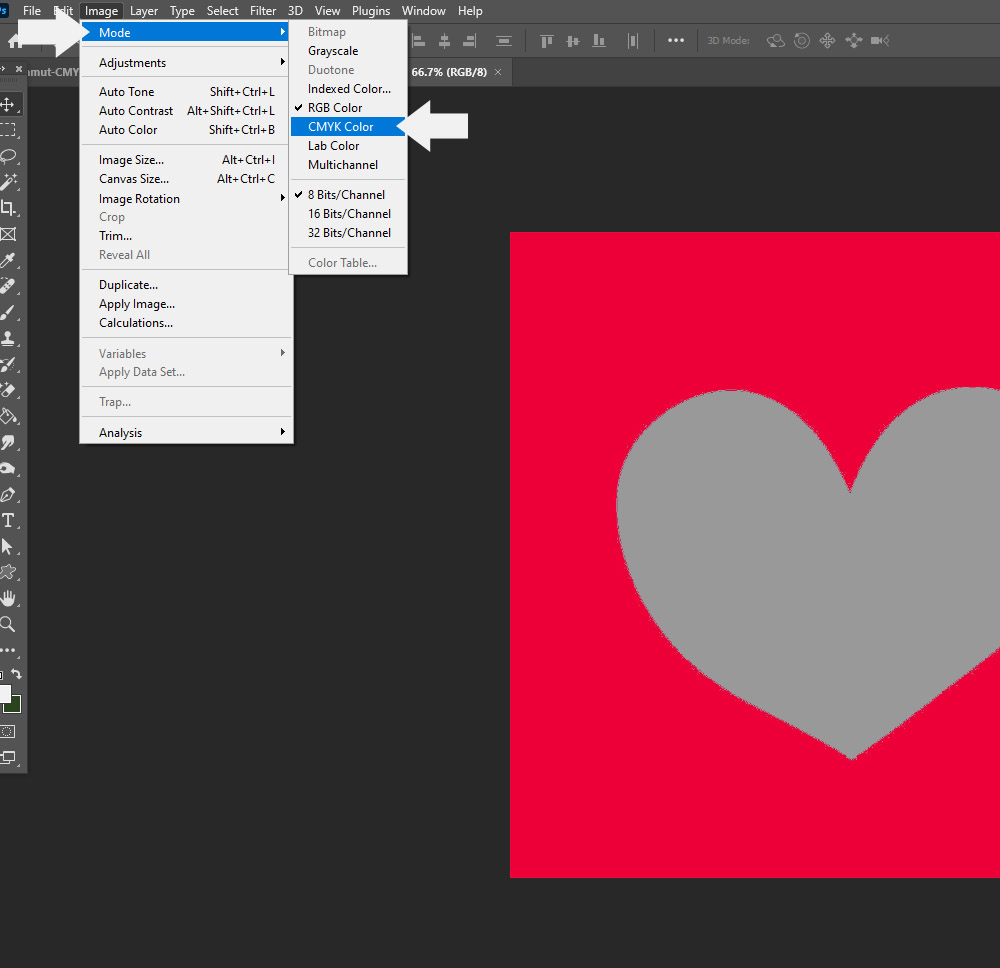
3) Now a trick designers use in order to get things ironed out is just select Image->Mode->CMYK. This will change your colors to those which is compatible with CMYK printers. To return this to an RGB file just select Image->Mode->RGB and you are all set.
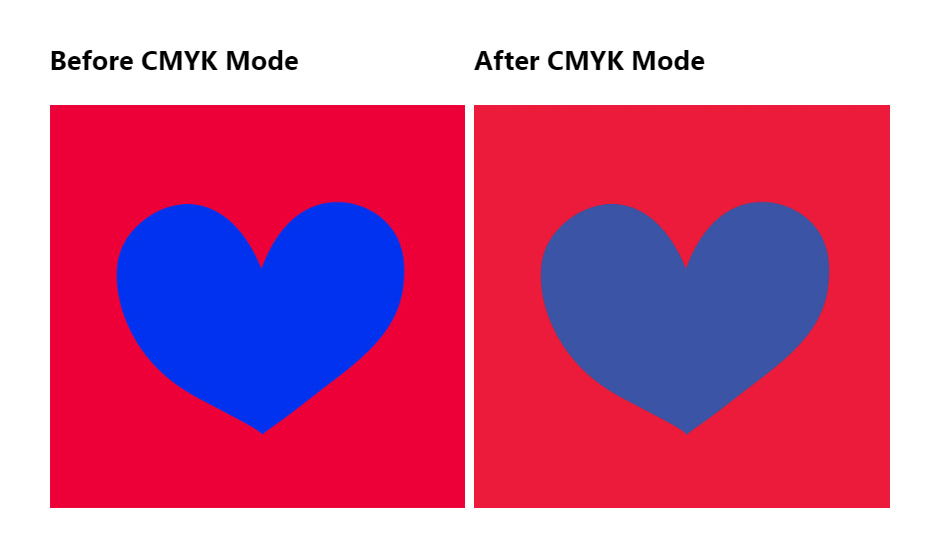
Below, you can see a before and after of the original colors side by side.
Before CMYK Mode
After CMYK Mode

If you are using the example colors you will notice the blue softened into a smoky bluish purple, but the reddish pink stayed nearly the same, tho just a tad softer and a smidge yellower. After our change, the colors are now #eb1b3a for the reddish pink and #3b54a5 for the blue. Now you have a better idea of what your image will look like once sent to a CMYK printer.
Photopea
I have tested this out in an online application found at Photopea.com – which is free and works in your browser with no installs. It’s very similar to photoshop and is a great alternative for getting around this issue. I had tried it on a png, which I created out of gamut for the purpose of testing this. I first mentioned it here in the Digital Scrapbook forums a couple of years ago.
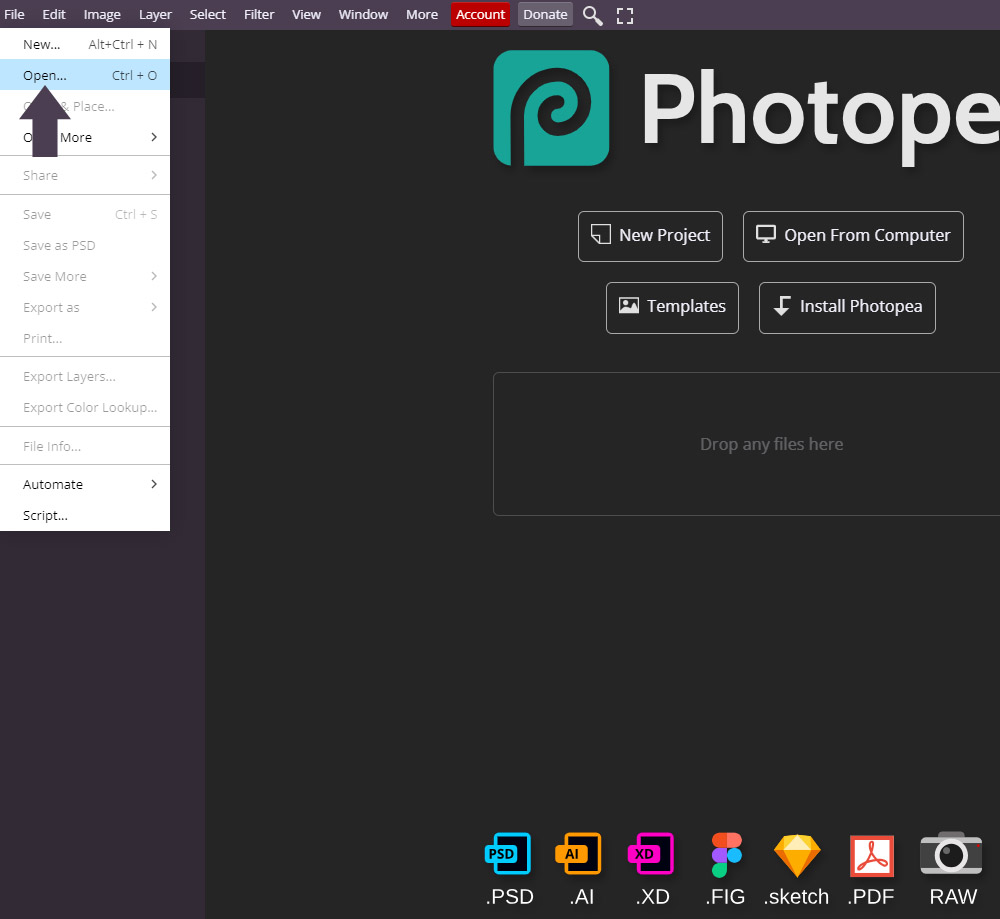
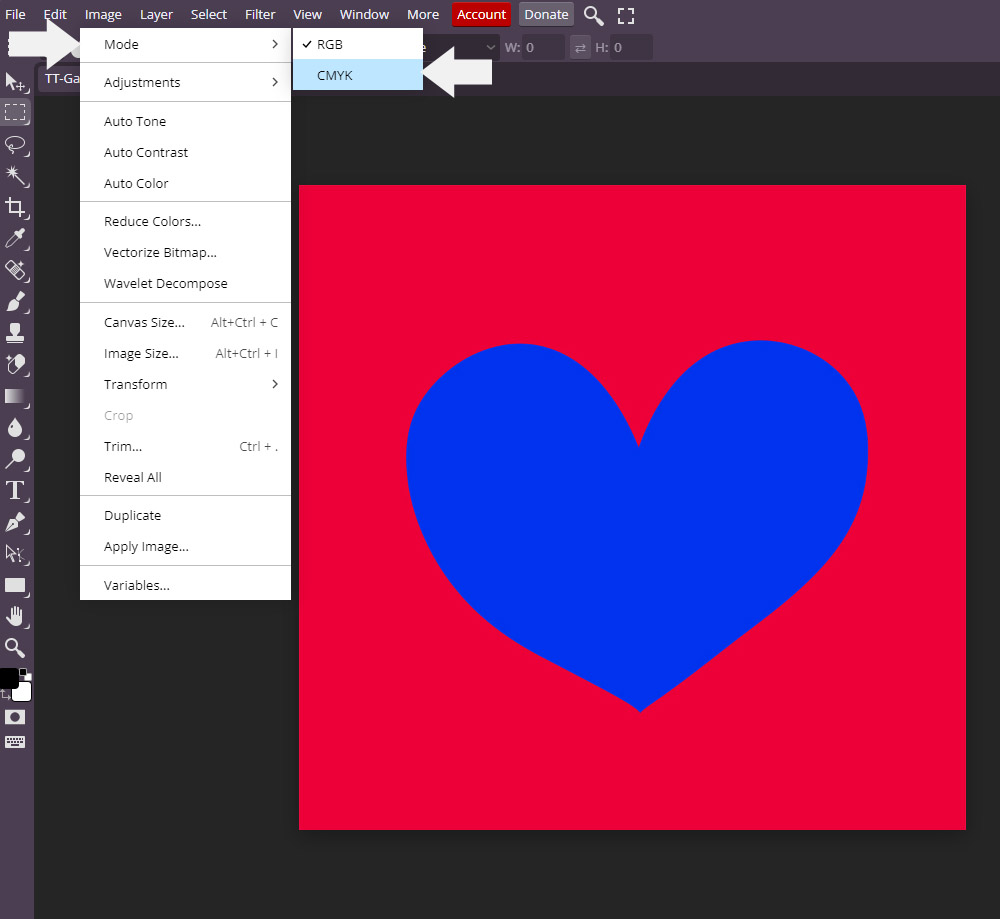
1) Load https://www.photopea.com in your browser. Now Select File->Open and browse to open your file which you are looking to check gamut or change to CMYK.
2) In the menu select Image->Mode->CMYK You will notice the out of gamut colors change.
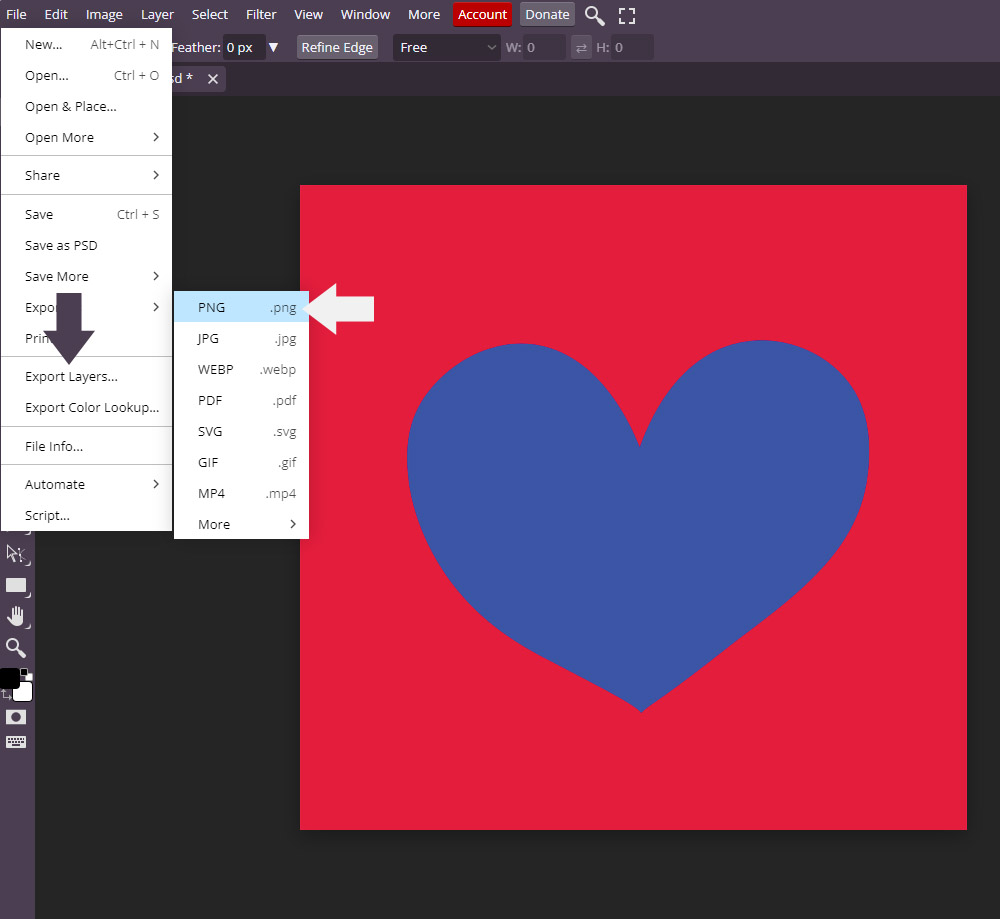
4) Now, in the menu select File->Export As->PNG (or jpg). Your file is now set to CMYK mode. If you want to change it back to RGB just re-open the file, and select Image->Mode->RBG – then save it once again.
If you would like to learn a little more about photopea’s CMYK mode you can go to their blog article about it, Photopea 5.2 – Color Profiles and CMYK Mode.
Please note, I am not an affiliate for any of these programs or applications. I am simply just passing along what I have learned.